Links
Tags
Building a new 3D Printer Workbench
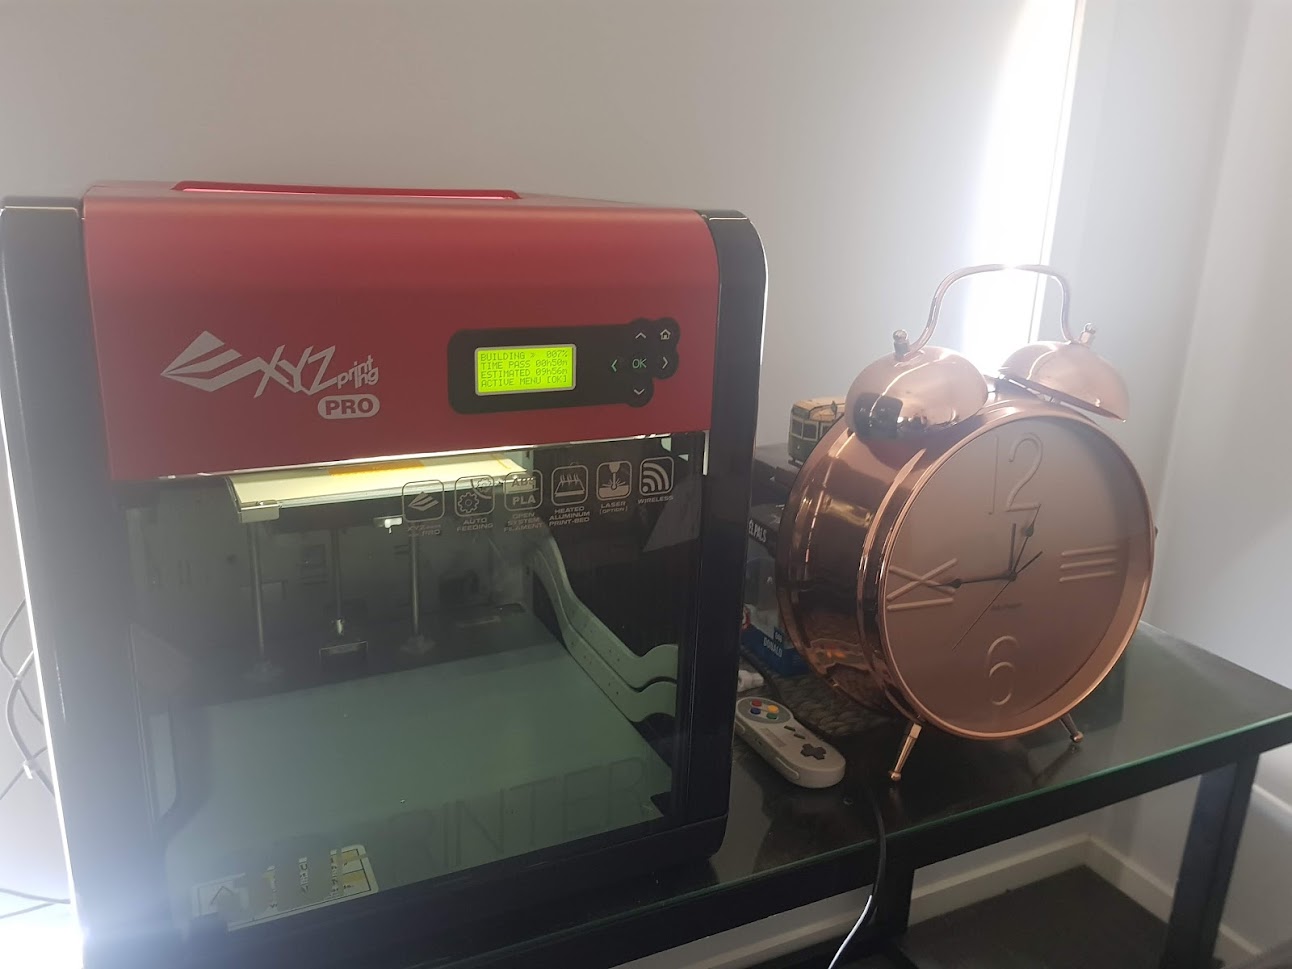
Several years ago, I purchased a 3D Printer due to a growing number of projects I wanted to start building. Given the prices had dropped considerably, I opted to purchase a Da Vinci Pro 3D Printer - a fully enclosed one that is somewhat suitable for ABS and PLA printing such that I could design and print a few cases and models for some electronics projects I was planning. Suffice to say, I got as far as 3D Printing a goose that lived on top of a Christmas Tree in 2019 before the preparations of having a baby began (read: lots of painting, house maintenance and other things during lockdown that were an incredible time suck).
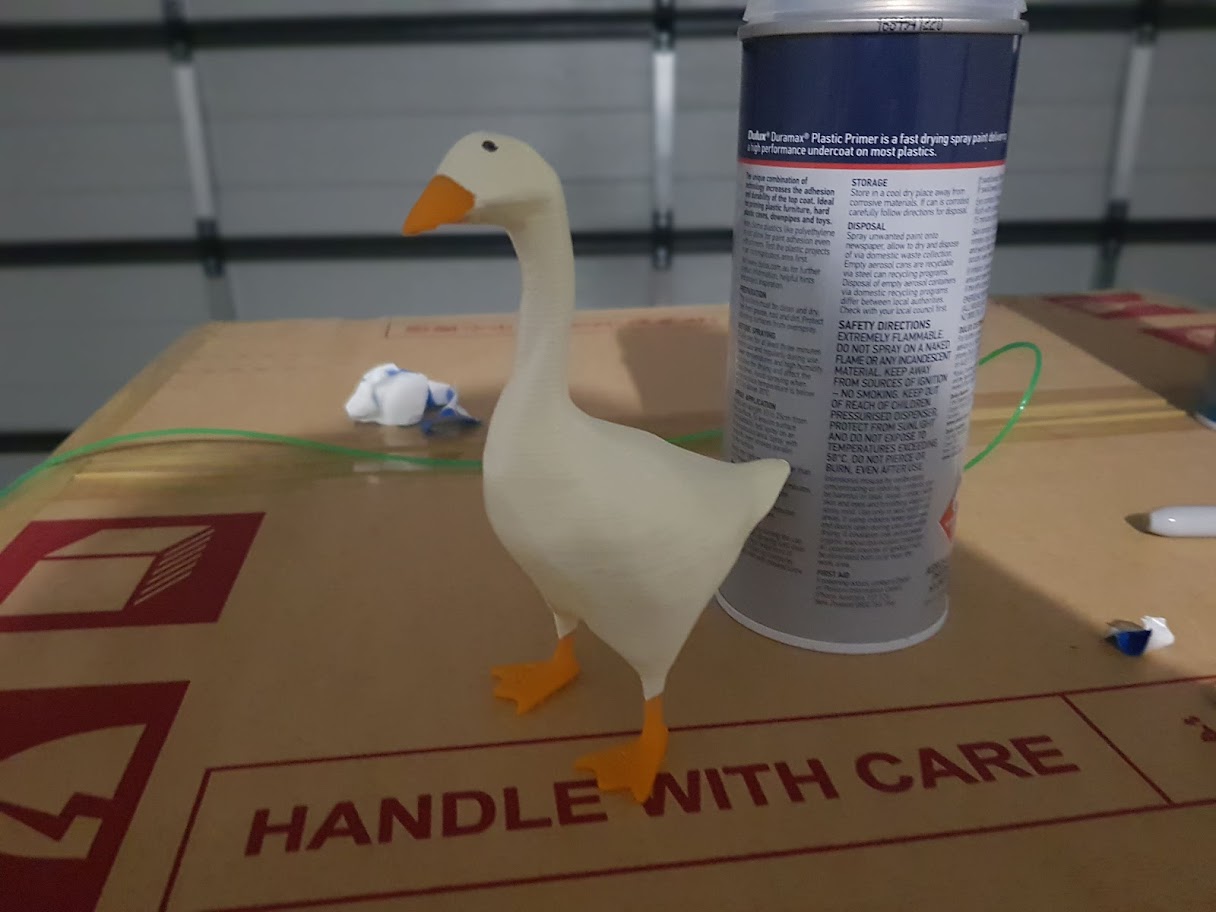

By the way, if you don't get the reference - I strongly recommend you check out a game coded and published by a local developer here in Melbourne - Untitled Goose Game. While short, it's a barrel of laughs.
With the garage walls painted, floor epoxied and my shelving in place, it was time to set up my workspace for 3D Printing and other projects. I had a table space of approximately 120cm x 60xm of which the printer itself took up around half of that. Somehow I managed to cram a soldering station and storage on the table in the remaining 60cm x 60cm. I've recently purchased a Resin printer and UV curing station in the hopes of printing miniature models with detail and of course there's no room to place these items in the current setup. This got me thinking about building a new workbench.
Earlier, I had some success building a couple of computer tables with an Alex shelf from Ikea and a Kitchen Bench Top from Bunnings. The end result is aesthetically pleasing and quite practical without costing the world to build so I figured something in a smaller scale might fit the bill.
If I were to replicate the same kind of thing as above with a couple of Alex Drawers, some thinner bench tops and some thick heavy duty castor wheels - it would be a super useful bench to move my growing 3D Printer collection and associated spools as well as store my ever-growing collection of electronics and microcontrollers. There's not much wrong with the dimensions of the existing table - 120cm x 60cm should be sufficient for these two printers and the curing tank. This will leave a little bit of space to work on as well, with plenty of storage for the growing electronics collection. And of course, the remaining 120cm x 60cm table can be used for the full soldering station with plenty of elbow room.
The order goes something like this:
- 2 x Brown Acacia Oiled Panels - 1200mm x 600mm x 18mm
- 2 x Alex Drawer Units - 580mm x 360mm
- 6 x Heavy Duty Castor Wheels
- 1 x VELCRO Heavy Duty Strips - 2.5m x 50mm
- 24 x Wood Screws - just enough to mount the Castor Wheels to one of the panels (3.8mm x 18mm)
- 8 x Wood Screws - just enough to mount the Alex Drawer Shells to the bottom panel (3.8mm x 28mm)
- Suitable washers for the Castor Wheels.
The total cost comes to around $380 if you have some screws lying around otherwise add a few extra dollars for some wood screws.
Having purchased much of this before lockdown no. 5 and a spare weekend to get it all done in, I set out to build the two Alex drawer shells and had a production line going for the drawers themselves. No photos of this stage, but having built them before the best thing I can suggest, like any Ikea product, is sort the screws into piles before beginning and have easy access to each of the parts.
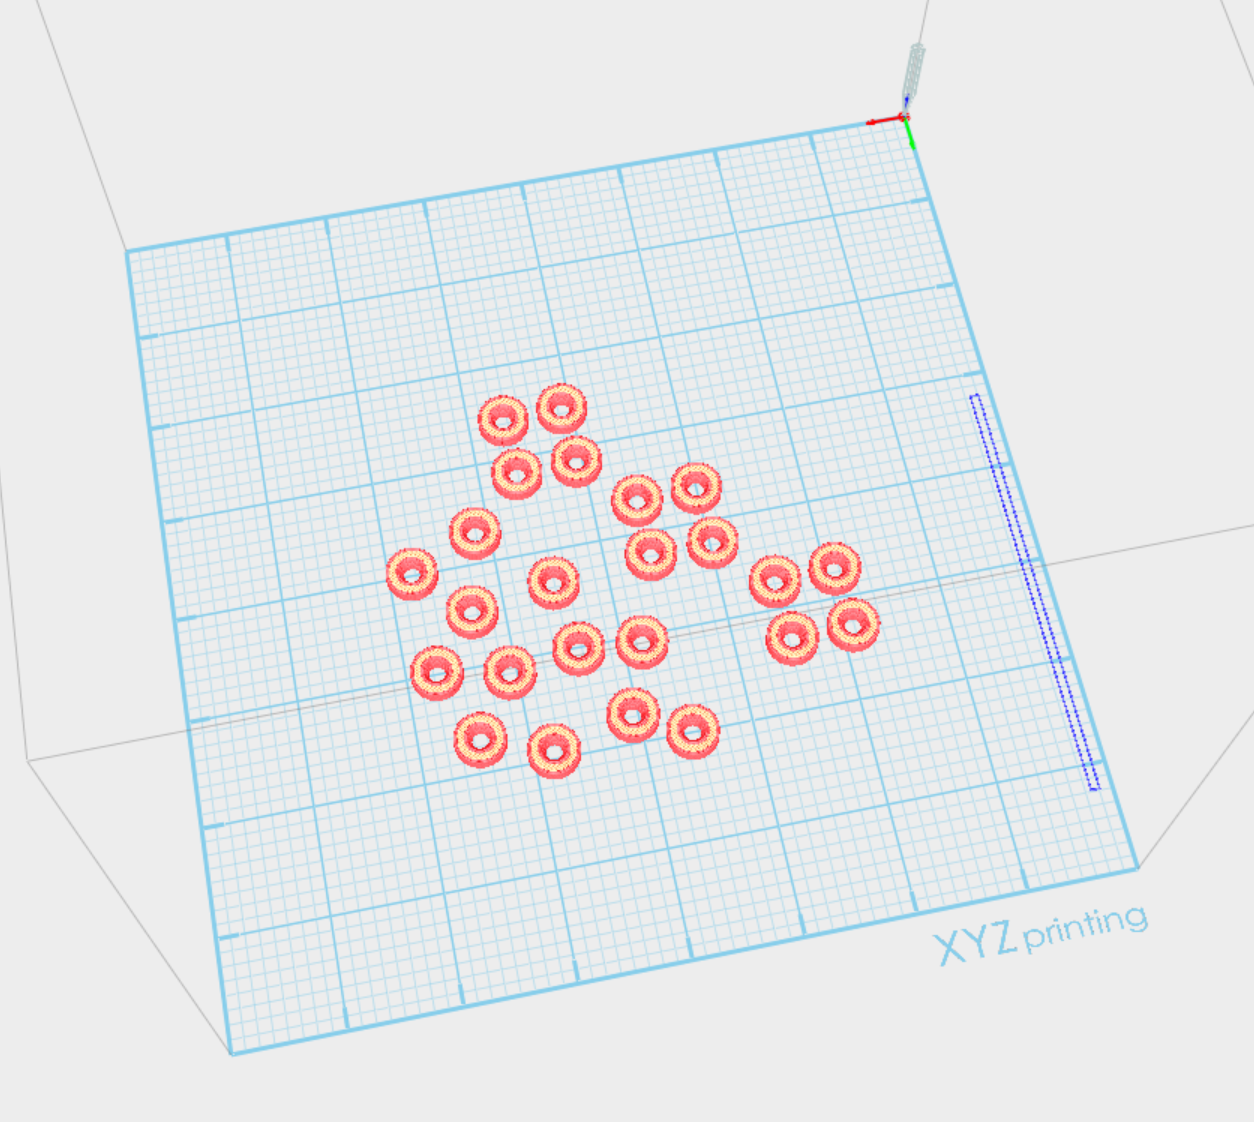
The next step was to build a platform for the drawers to live on. At this stage, I found some wood screws and was about ready to start drilling away until I realised I had no washers to hold the castor wheels in place! Not to worry - I've got a 3D Printer. So I pulled out my trusty copy of SketchUp 2017 and drew a countersunk washer. Having put 24 of these on the 3D Printing platform, it's now time to get them printed while assembling the remaining drawers.

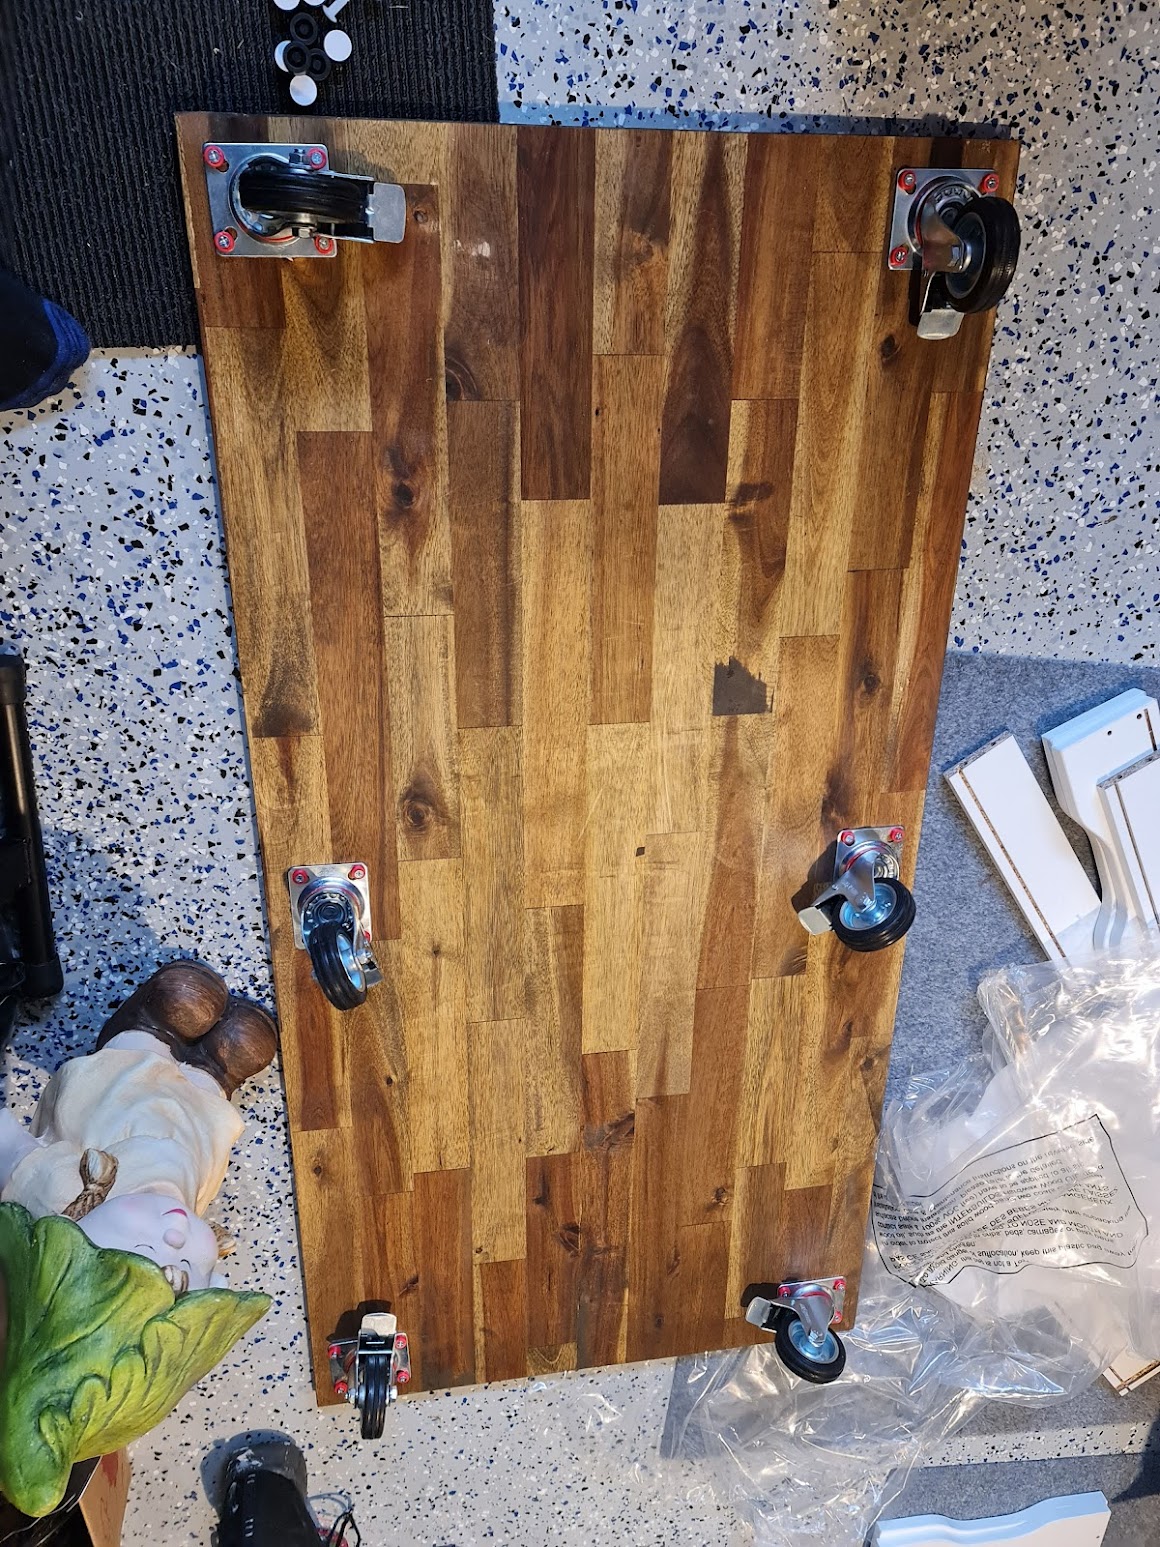
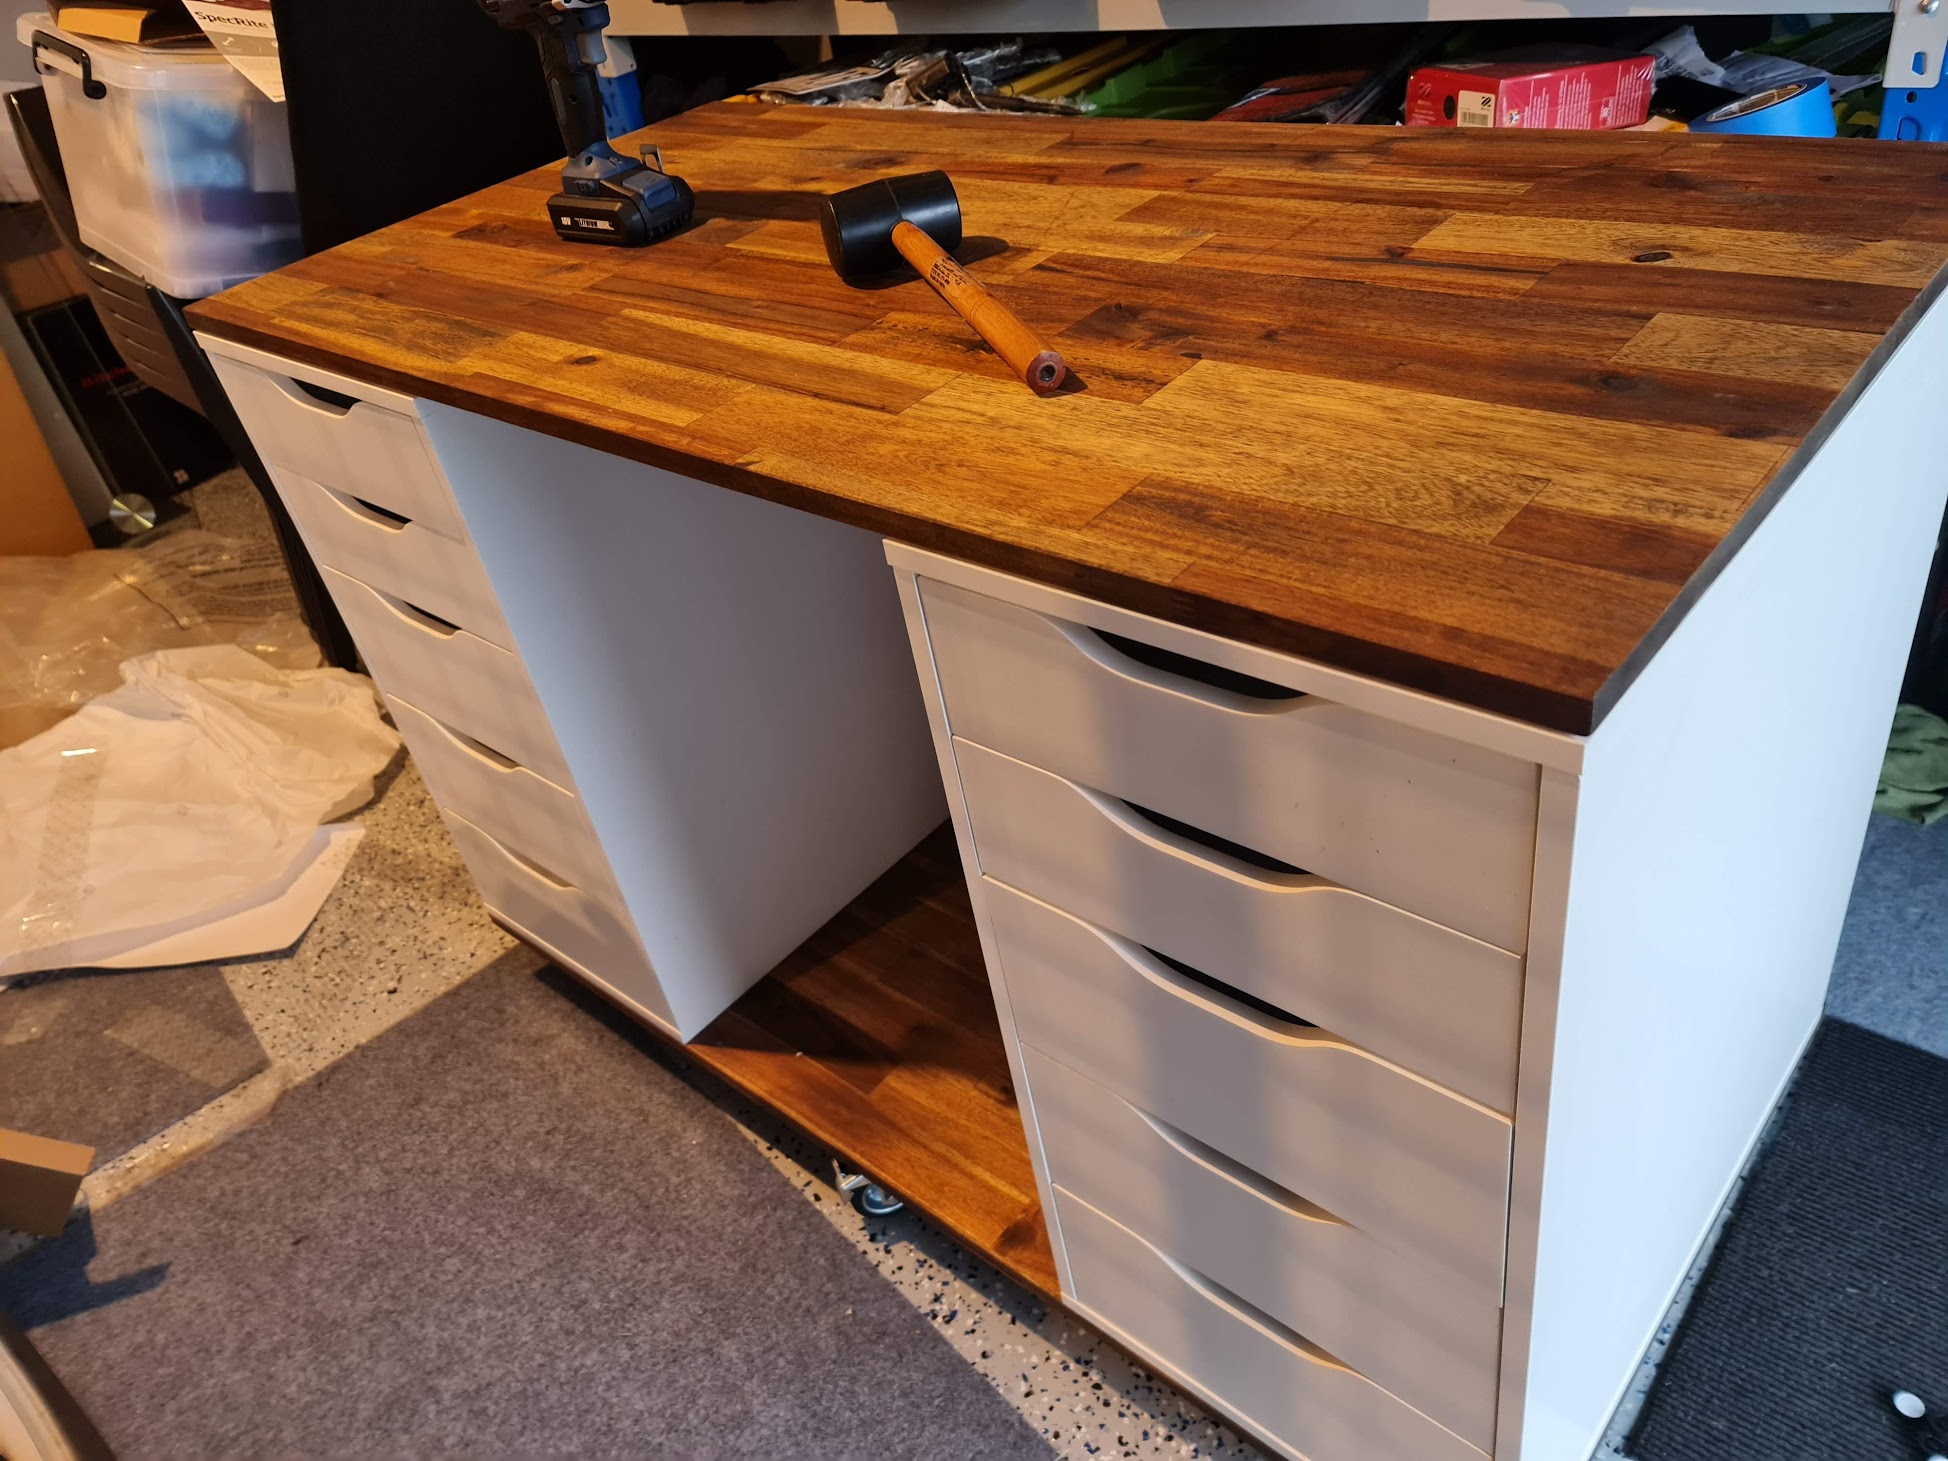
With all six castors installed, the next step is to mount the Alex Drawer shells to this panel. When assembling the shell, make sure you've got the right panel with the holes in it facing downwards as the top panel in this instance is solid. They are interchangeable - just be mindful about placement.
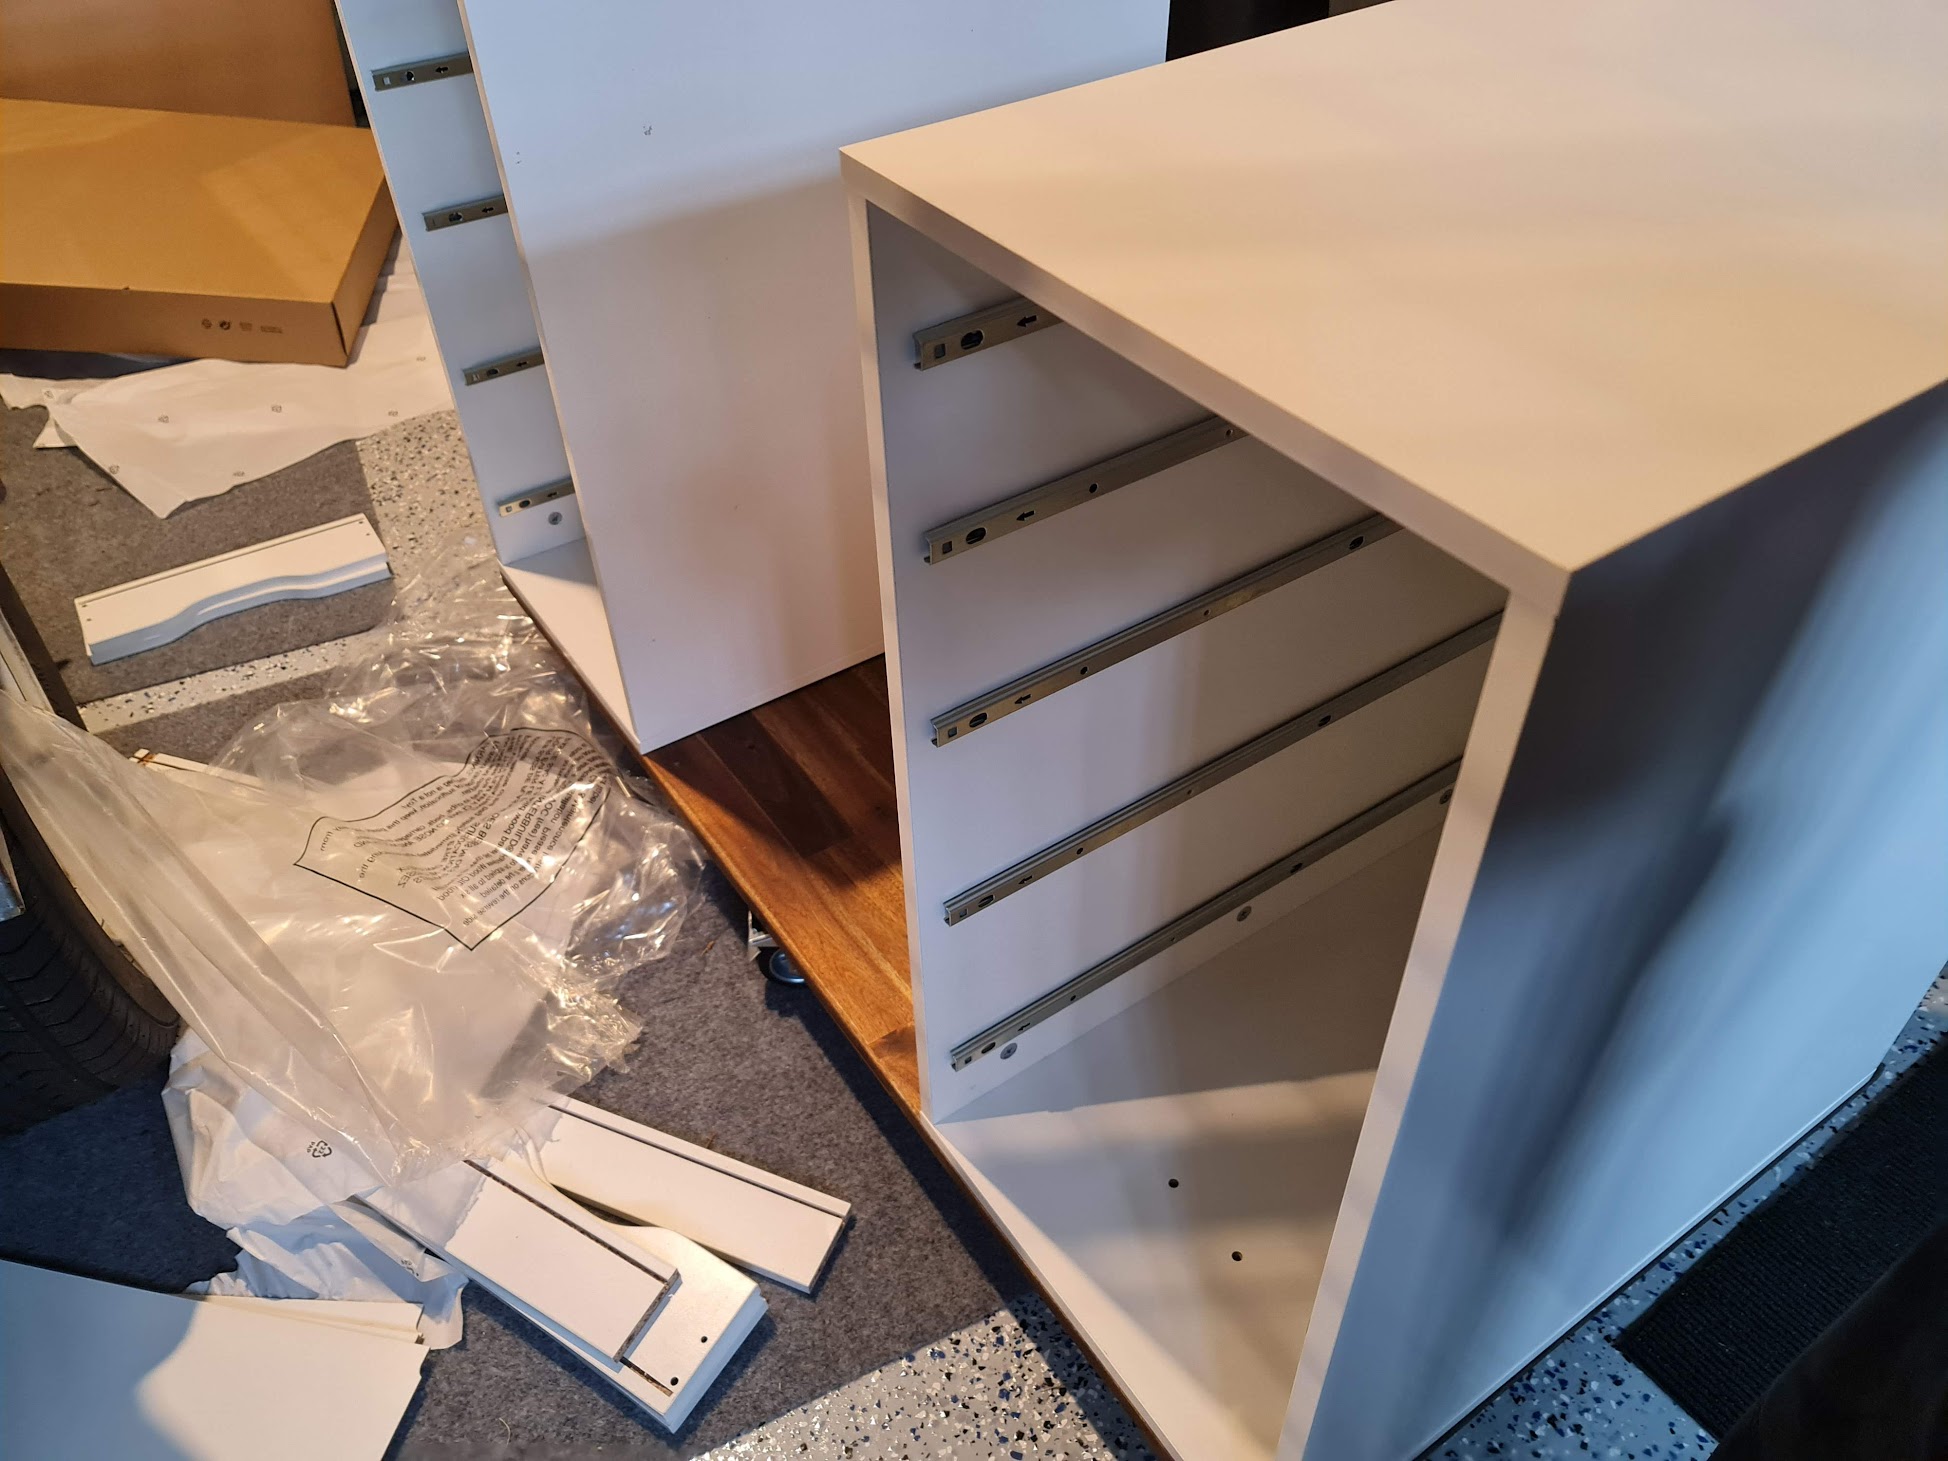
Now these drawers aren't perfect fits - there's about a 2cm overhang but for my use, this isn't a problem as the power board will mount at the back some time in the future.
Once complete, the next step is to cut VELCRO strips to length in four places to mount the top panel to the top of the drawers. I like the Velcro strips as it stops table movement on the top, but it's also removable if you need to adjust it or to disassemble it later. It also helps offset any minor table warping so it sits somewhat flush on top. I find it easiest to bind both sides of the VELCRO strip together before cutting into lengths. Remove the sticker from one side and place it on the wood panel but leave the sticker on the side that will attach to the top of the drawers until ready to assemble.
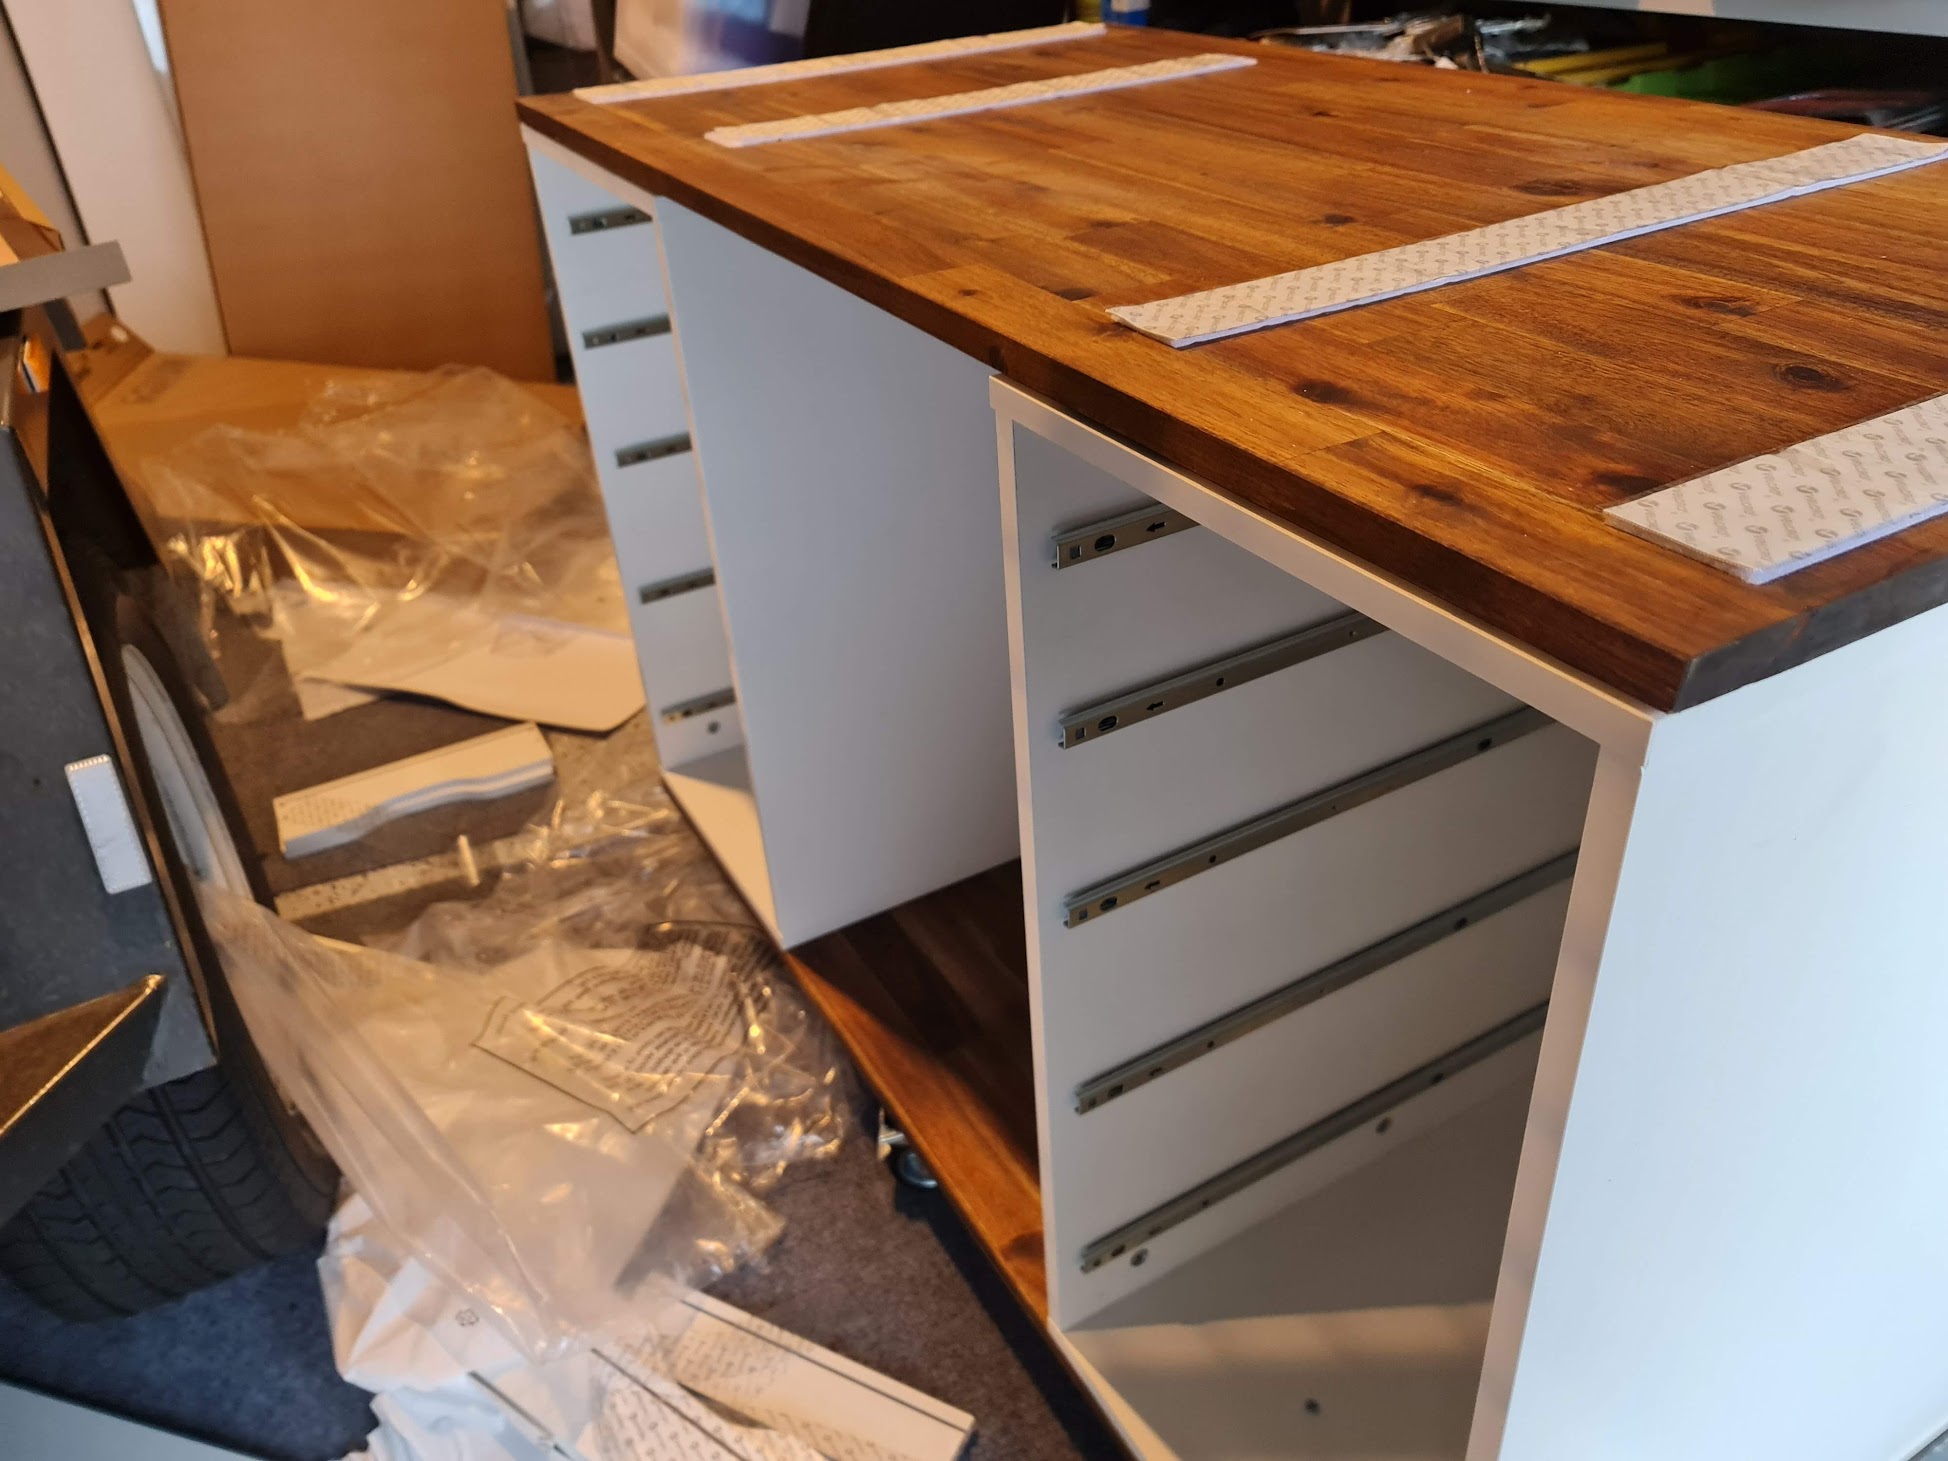
The final step is to remove the protective sticker and carefully flip over before mounting. By slowly letting the front down, I was able to make minor adjustments until both sides were square with each chassis. Once in place, push down where the strips are attached to ensure a good seal with the cupboards underneath.

Having then assembled the smaller drawers, it's time to insert them into the chassis and screw them in.

It's finally done - end to end it took around two hours with most of that time in assembling the drawers themselves... and probably another two hours moving all of my electronics and microcontrollers to the drawers. With a bit of cleaning and unboxing the Resin printers, I can see how they'll look including turning the printer on for a quick run.
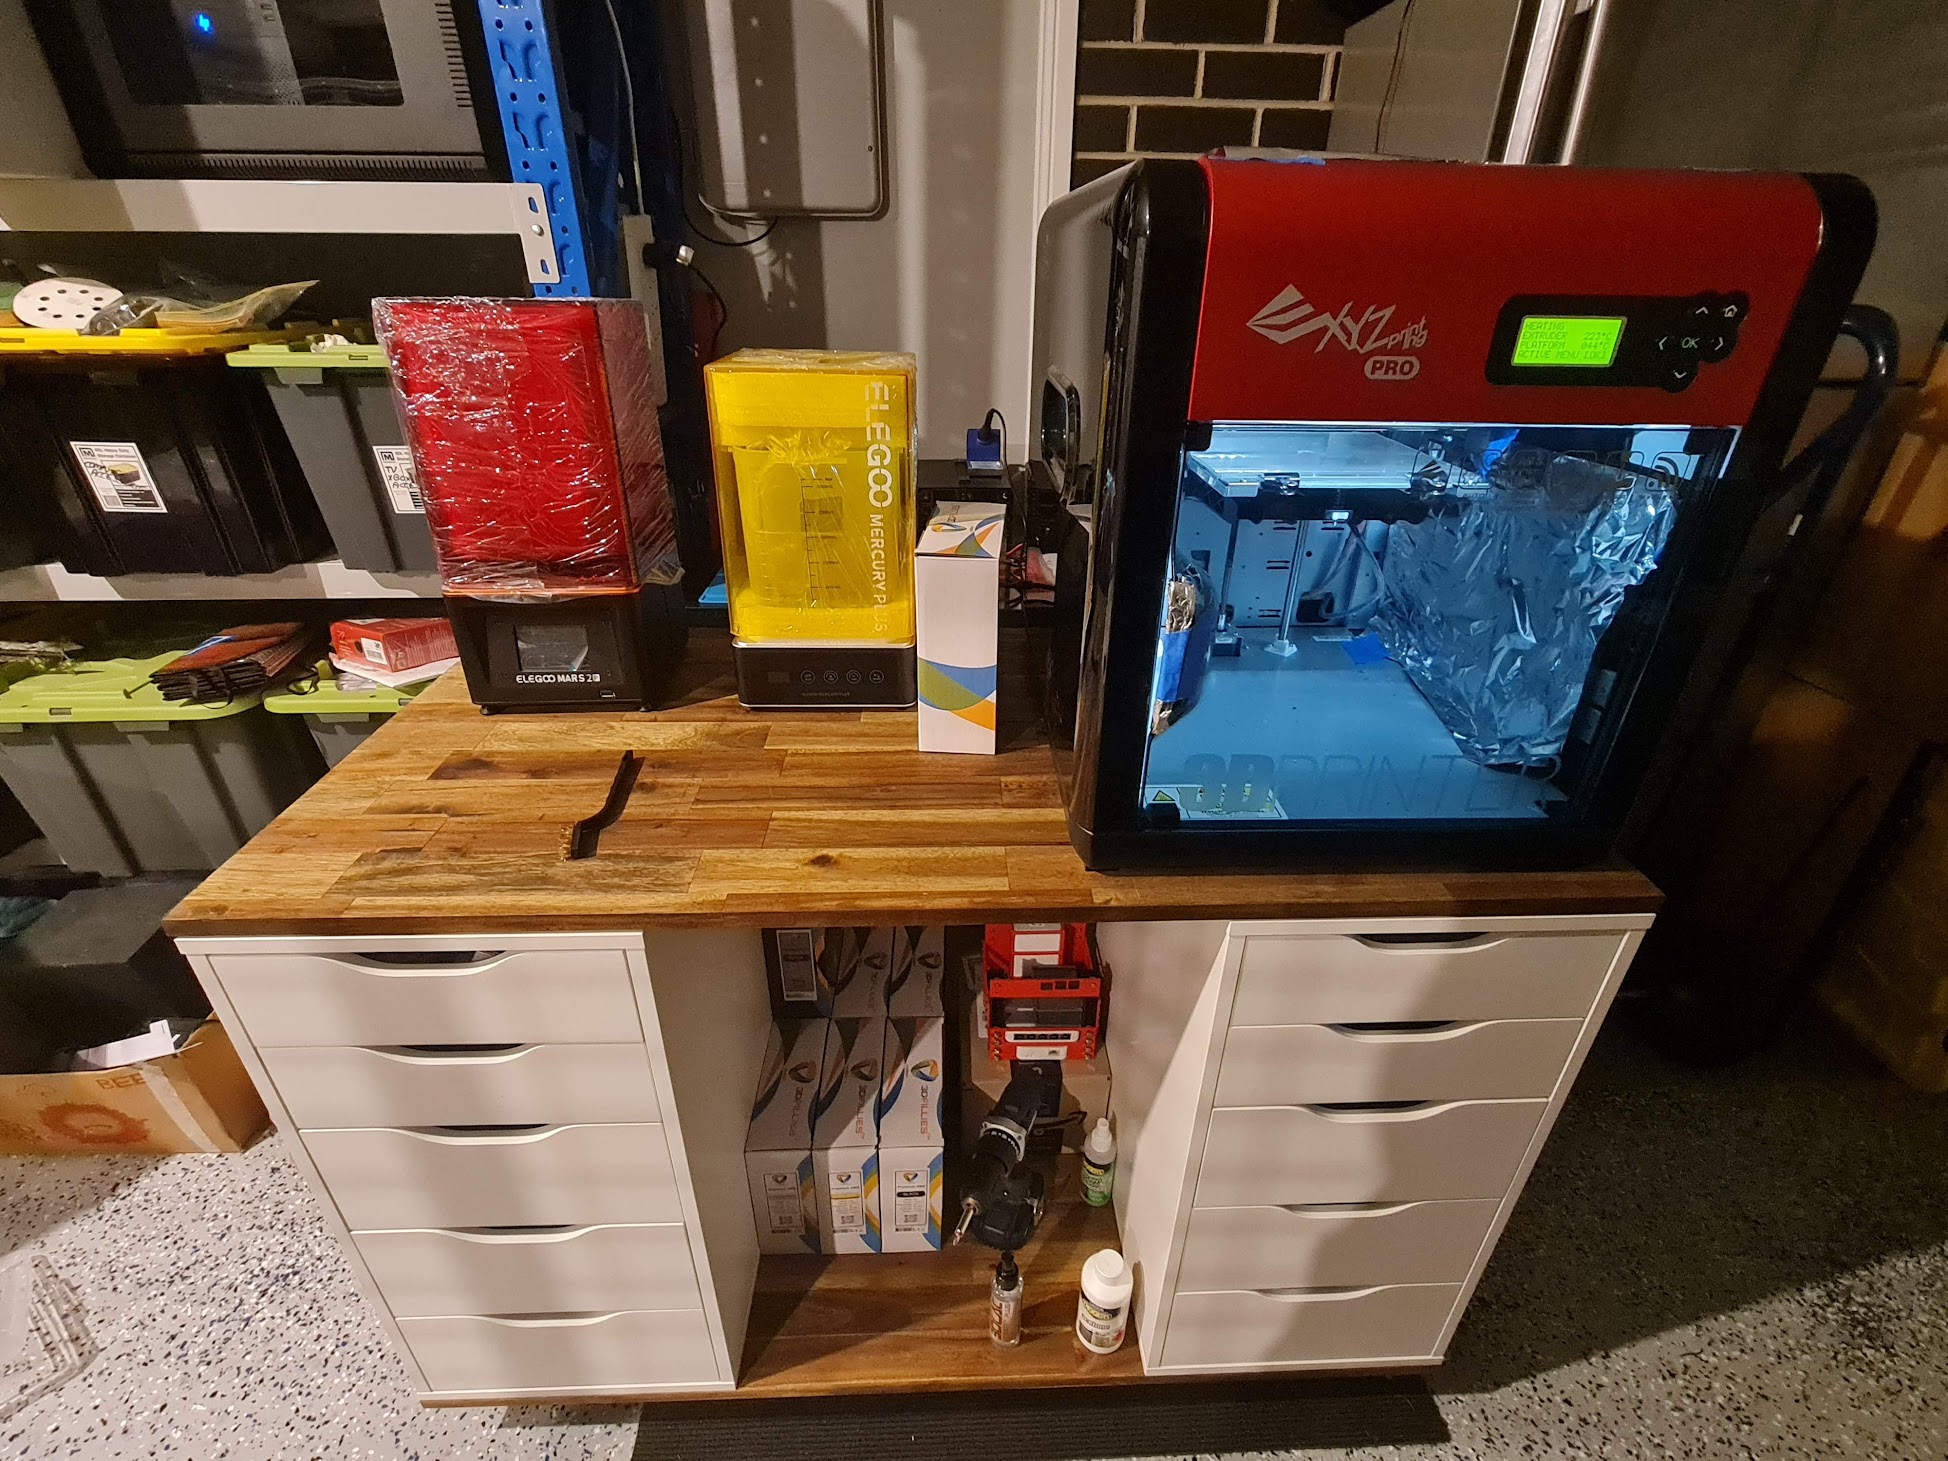
For $380, this looks and functions fantastic. It really is just a platform with a few drawers attached, but now it's home to most of my project work ready to wheel around the garage as necessary. Given how well this came out, there might be another one made in the coming months to move the soldering station among other things to.