Links
Tags
Building a Synchronised Christmas Lights to Music Display - Part 1
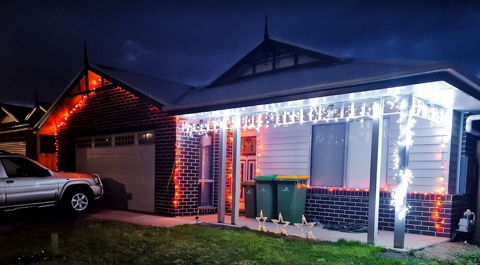
With only a couple more lockdowns to Christmas, it's time to get those gifts ready, plans organised and all that other stuff people do in the leadup. I used to despise people who'd start this far out from Christmas, but this year is a little different. My son last year (who is coincidently 1 year old today!) was mesmorised by some Christmas lights we put on the outside of our house last year. Nothing fancy - just some icicles and fairy lights from good ol' Bunnings. They did the blinky blink thing and he really enjoyed it.
No surprises that Covid-19 lockdowns have done a number on people looking for inspiration and last year it really shone through at least where I live with the sheer number of displays up compared to previous years. Some are quite impressive - entire houses covered in more fairy lights that would give Griswald a run for it's money. I'm also reminded of a display I saw a few years ago in the western part of Victoria that seemed to have some crazy Dubstep tunes pumping out to Christmas Lights. While it's not my choice of music, I can appreciate the effort that went into synchronising Arches to the bouncing beats.
I've always wanted to build a full-on Christmas display. I figure that with some programming talent, recent work on 3D printing and a few Raspberry Pi's and Arduinos, I should be able to build something similar albeit without all the Dubstep. Perhaps something a little more traditional and banter-ish.
Amazon sneakily recommended me some WS2811 lights and to make matters worse for me, they sealed the deal with a $5 coupon to go with it 😊. I figured at the very least I can start experimenting with a Raspberry Pi and turning these "NeoPixels" on and off individually.
In the meantime, I put my Google-Fu to good use and found some displays which looked interesting nearby but nothing out where I live in the eastern part of Victoria. I found the one in the western part of the state that I saw as well as another that had a large Mega Tree. There's just something not quite right to me though - don't get me wrong, it's a perfectly good display but not something that I could really see fitting my front yard.
That lead me to another forum (yes - active forums still exist apparently!) AusChristmasLighting. I must have spent 3, 4 maybe even 5 hours working through the Display Videos section - there were some pretty awesome synchronised displays there. With some YouTube-Fu, a guy by the name of Tom BetGeorge kept coming up and I eventually found the display and song that would inspire me now to build some props and try something simple. The music sequencing is near perfect in time to music, the banter the Trees have is fantastic - this is the sort of thing I'd been wanting to do for a while. It's amusing, kid friendly and has the right amount of joy for me that would make it worth doing.
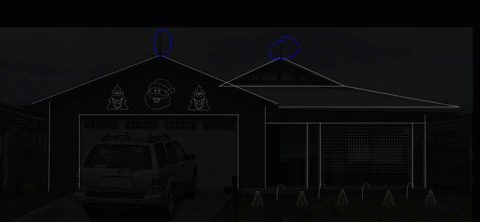
The forum I mentioned earlier - at first I didn't know it was an active forum until I started looking through the comments section of those videos. Definitely a treasure-trove full of advice (conflicting sometimes, but at least you get to hear lots of different opinions as this can get expensive very quickly if you make a mistake). The one consistent theme was a lot of praise for some free software written by an Aussie called xLights. On face value, it's sequencing is inspired by interfaces similar to FL Studio which I use a lot for sequencing music, and thought I'd jump right in and mock up a layout - see what this thing could do. It was fairly intuitive I've got to say. It doesn't look well organised when you first load it up on a 4K screen, but I was able to, having not read any manuals or watched any YouTube videos, roughly work out what to do. So much so that I had created my first rough layout.
Those Christmas Trees and Santa were part of what I would find out later to be a supplier of 'Coroplast' Christmas Props. I did have to wonder what kind of rock I'd been under to not realise this stuff was readily available but unfortunately shipping would prove to be a bit much and the sizing would not be compatible under the roof line - given the decorative elements already there.
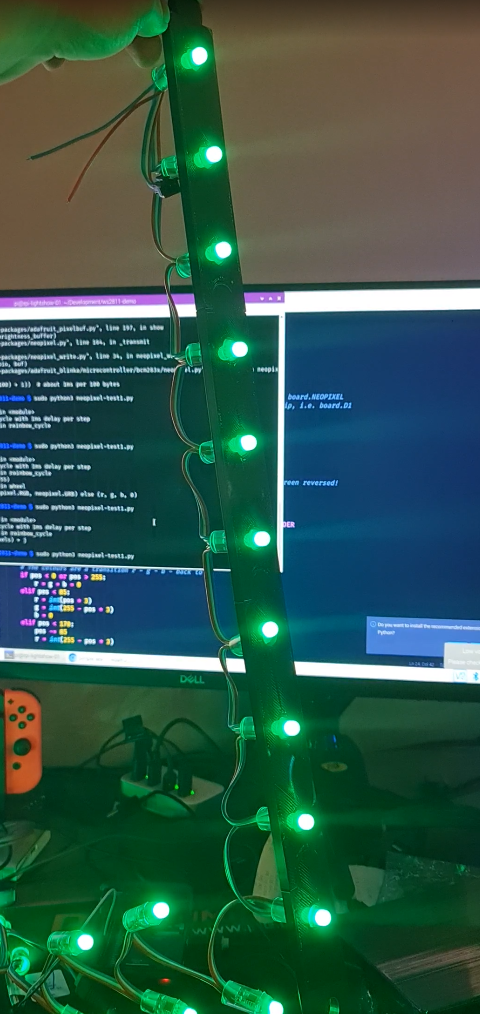
Those lights I ordered eventually arrived so I started sketching up a template that should fit the bulbs. The best way I find to work with 3D printing, especially when it comes to measuring up things is to take a measurement, but then put a hole slightly bigger in as well. Print a few test templates. I wrote a few lines of code using a Python library for WS2811 LEDs.
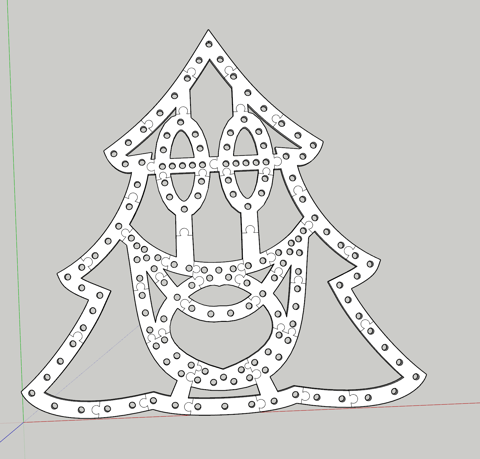
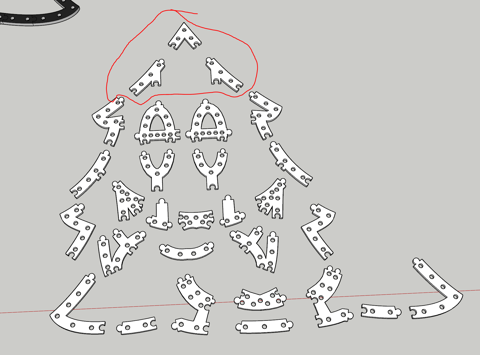
Great! The next step would be to climb up the side of the house and on the roof to get some measurements and think about custom designing some of these props. They would need to have a particular wiring order (configurable in xLights) and an appropriate size. Having drawn half a tree in Sketchup, I eyeballed the placement of the correct dimension for those bullet pixels. Once done, it was copied and flipped horizontally for symmetry and I began drawing Jigsaw lines in (I had experimented with a couple of joining techniques, this one works well for ABS at least. As you can tell, this isn't going to leave much room for error, but nothing a Mallet can't solve.
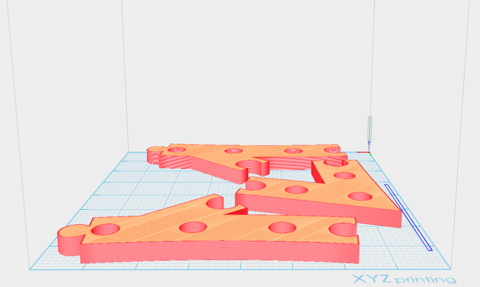
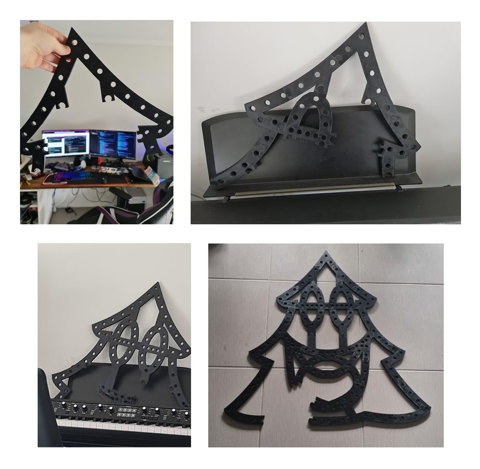
The print time would take around 5 days to complete. This method isn't perfect by any means. As it turns out, either the print diameter or the bulbs themselves are not identical meaning some fit well, some are too loose and some are too tight. Also, the eye balling of bullet placement should have taken into consideration strings of 50 to avoid lots of cutting, splicing and soldering. If I were to do this again, I'd probably more densely pack pixels and perhaps shape up more of a mouth to get it to 200 pixels and look to more evenly space the pixels including changing the hole design so the bulbs "clip" in rather than hard pressed. So while not perfect, the dimensions will certainly fit within the desired space.
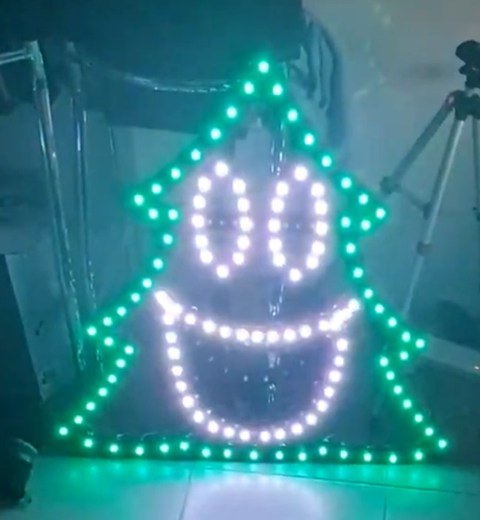
With all the bulbs pushed in using a tool from this guy (which I should have found before I started, it would have saved my hands a significant number of cuts not too dissimilar to 90s era PCs), it was time to fire up xLights, and an OS for the Raspberry Pi called Falcon Player. Having connected the 12V string of 156 bulbs to the Raspberry Pi and injecting some 12V 5A into the string, and a face singing a song, well... here is the result (albeit with a bulb or two that requires better remapping).
There has been a lot of progress in the last few weeks on this including the Mini Tree, Santa and Candy Cane. I'm still yet to determine how i'll complete a Matrix, but I've got some ideas using some PVC Conduit and some 3D Printed templates to drill in. I'm also waiting on some WS2812B LED Strips to come in from AliExpress to do the house outline with. I've also sequenced a couple of songs already to get the hang of xLights (hint: there are a tonne of YouTube videos explaining concepts to help you accelerate your way to creating effects). Those will certainly be a bit of fun to work with when the time comes, but none the less this year's Christmas display is shaping up to be something awesome.
